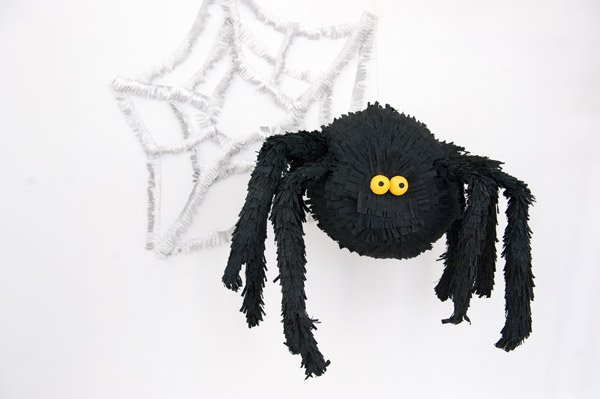
Jack o Lantern Cheeseburgers
/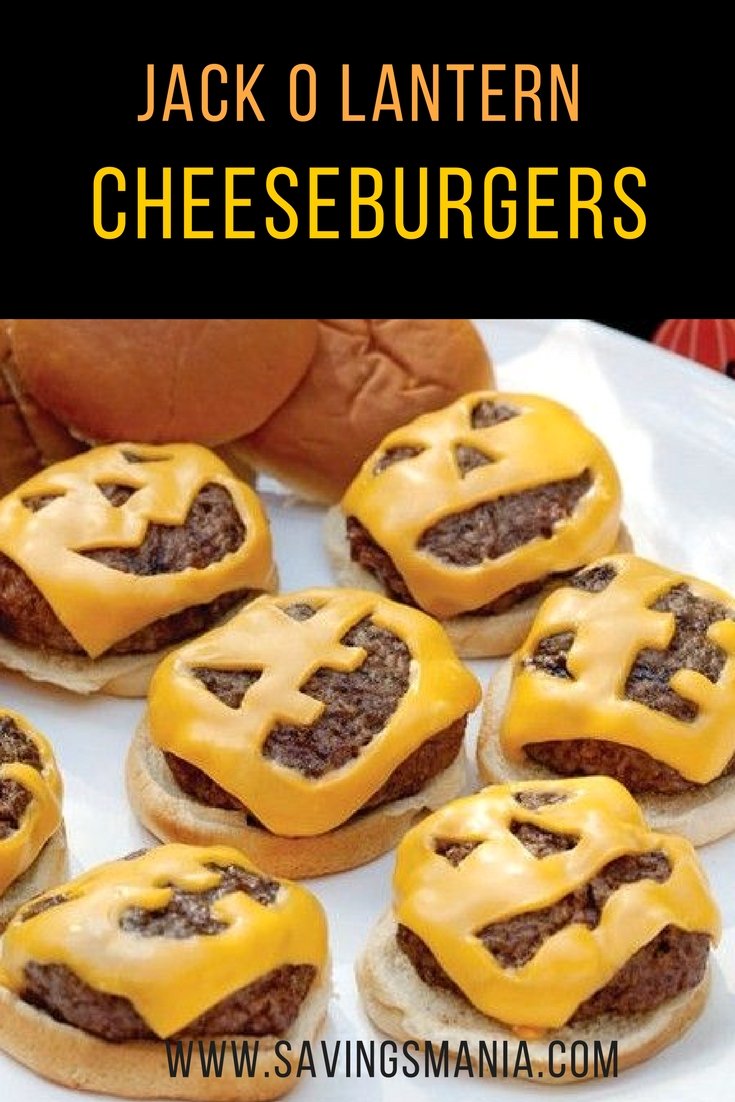
Great dinner idea for the kiddos before they head out trick or treating! Simply stock up on Kraft cheese singles, gently carve out a jack o lantern face, melt on hamburger patty and you are done!
Carving oranges is a lot easier than pumpkins. Cam and I used a small paring knife and scooped out the inside of the orange. Carving the front was super easy! If you like, insert a small tealight and you have a mini jack o lantern.

Look how cute this turned out??


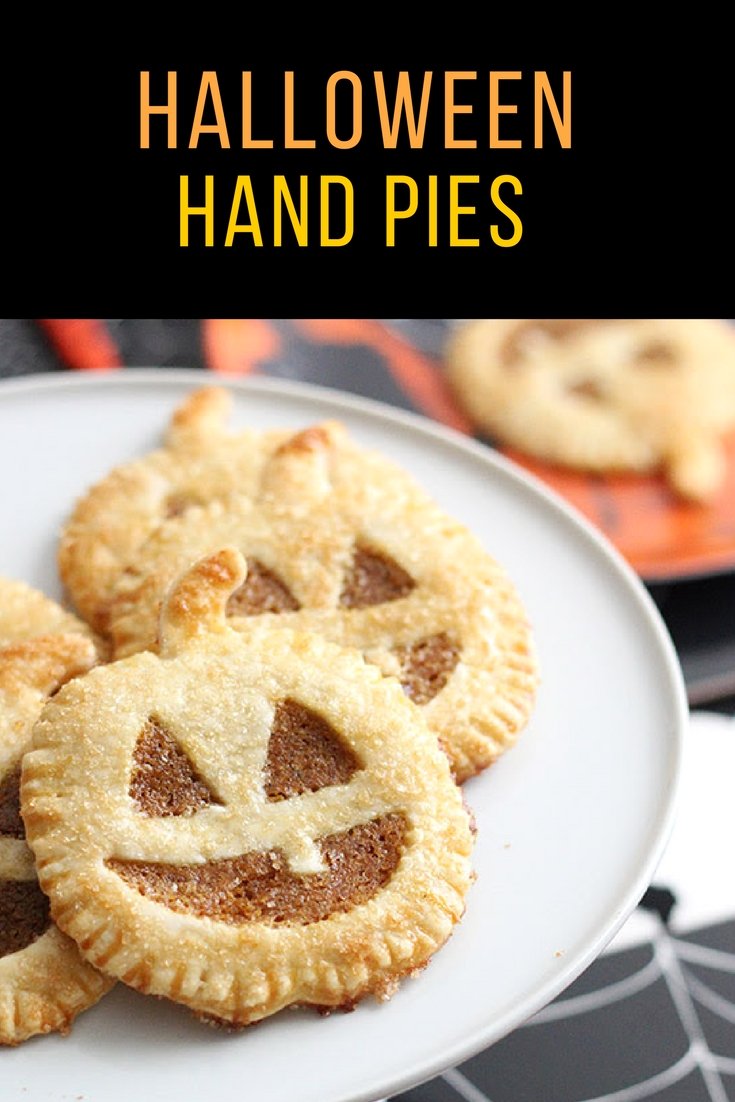
Jack-O-Lantern Hand Pies
Instructions
1. Preheat oven to 400 degrees. Line a cookie sheet with parchment paper.
2. Using a stand mixer or hand mixer, mix together the granulated sugar, dark brown sugar, salt, cream cheese, pumpkin pie spice, ginger, and vanilla extract until smooth. Scrap down the sides as needed. Set aside.
4. Gently roll out the pie dough just until smooth between two pieces of wax paper. Using a pumpkin shaped cookie cutter (we used this pumpkin cookie cutter from Williams-Sonoma), go around the pie dough in a circle and cut out pumpkin shapes. Using the tip of a sharp knife gently cut out triangle eyes and mouth. Feel free to have fun making different jack-o-lantern faces.
5. Place the pumpkins without faces on the cookie sheet. Brush the edges lightly with egg wash. Take 1 ½ to 2 teaspoons of filling and spread it around the pumpkin leaving the edges clear. Too much filling will ooze out so be careful here.
6. Press the faces gently on top of the puree and seal the edges with a fork. Brush lightly with egg wash and sprinkle the top with a little raw sugar.
7. Bake for 12-15 minutes on the middle rack. Serve warm or cold.
Makes about 12 hand pies.
Source: Pottery Barn
We really enjoy carving pumpkins every year. Every year, we are always trying a new design. Here are some of our past projects!


16 oz chocolate candy coating
6 oz vanilla candy coating
Black sugar pearls
Candy and sprinkles in your favorite Halloween colors
You’ll also need:
9-in. by 13-in. pan
Parchment paper
Toothpicks
1. Line baking sheet with parchment paper allowing about an inch to extend above the rim on two sides for lifting.
2. Microwave candy coating in a heatproof bowl on medium. Heat in 30 second intervals, stirring in between until melted and smooth. Next melt vanilla candy coating in a separate bowl.
3. Pour chocolate coating into baking sheet. Working quickly, spread into an even layer. Then, carefully spoon about 10 small circles of vanilla candy coating on top of the melted chocolate.
4. Quickly use a toothpick to coerce the candy coating and define the floating ghosts by drawing a circle shape that comes to a curved pointed end. Keep the toothpick to the surface of the white coating. If you insert it too far in, it will start to mix with the chocolate coating. Place sugar pearls or confetti sprinkles in position for eyes and mouths.
5. Then top with various colorful sprinkles and candies around the ghosts.
6. Let set completely before cutting into pieces.
Note: If the chocolate starts to set before you have finished decorating, just pop it in a warmed oven for a minute or so to reheat the surface and allow the sprinkles to stick.
Source: Bakerella

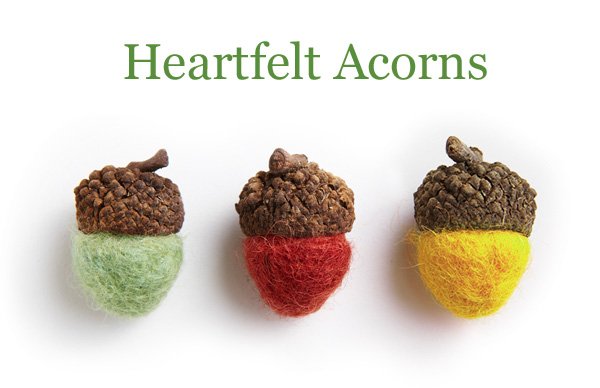
Materials
Wool roving (found in yarn or crafts shops; use natural or dyed roving)
Dish soap
Warm water
Acorn caps
Hot glue gun
Spray paint (optional)
Instructions
Tip: If your ball wants to separate, add a thin layer of roving and continue to roll it until it is a solid ball.
Tip: For a colorful twist, spray-paint the acorn caps in a metallic holiday shade or a color of your choice. Allow the caps to dry before attaching them to the felt body.
Decorate and Adorn
Here are nine ways to enjoy your super-cute handcrafted felt acorns:
Source: Homemadesimple.com

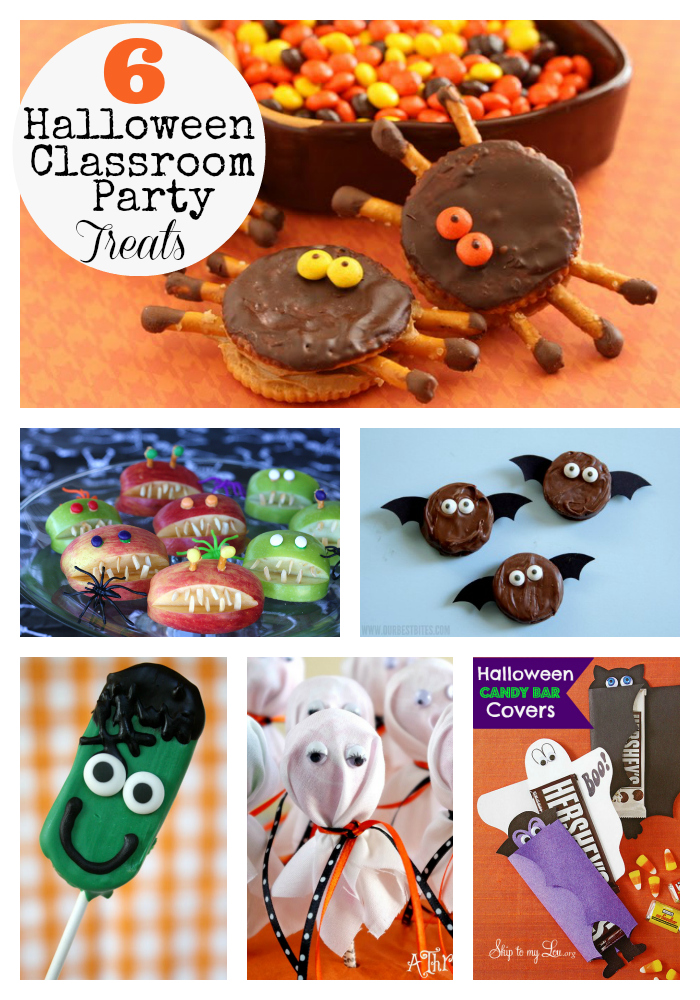
Looking for some fun Halloween treats to make for your kiddo's classroom? Here are 6 fun treats from Skip to My Lou.

Pictured: My little Cameron, dressed up for Halloween, 2003
Halloween is all about the unhealthy treats, but this year I wanted to try something different. As a family, we are all working on a better diet. I found these healthy, Halloween-inspired treats @ BHG.com. Also be sure to check out our Halloween Pinterest board, for over 500+ ideas!
1. Veggie Skeleton with Double Dip. Create a spooky skeleton from your favorite vegetable dippers. Serve with extra cut veggies so as Halloween party guests eat the food, they can rebuild Mr. Bone's body for fun.

2. Hummus Pumpkin. When shaped into a simple pumpkin, hummus gets transformed into the perfect festive Halloween party food. Scoop hummus onto a serving plate, cover with finely shredded carrots, and make a stem from a piece of green onion -- it's that easy!

3. For a horrifyingly delicious Halloween party recipe, use mini Halloween-theme cookie cutters to cut out pieces of cheese and meat. Place the creepy cutouts on top of your favorite crackers and accent with leaves of dark green lettuce. Small black olive pieces easily embellish these creative crackers.

4. Graveyard Taco Dip. This would be really fun for a party too. Venture into this graveyard and you'll discover a tasty taco party dip. Layers of refried beans, lettuce, and black olives mimic dirt and grass; tortilla shells easily transform into tombstones, a spooky tree, and a creepy cat.


This looks like a really fun gift to make for Halloween. Here are the how-to's from TheIdeaRoom.net.


 Email Article to Friend